When your WordPress website gets hacked, quick action is essential to minimize damage and restore security. This comprehensive guide walks you through identifying hack symptoms, implementing immediate recovery steps, and strengthening your site’s defenses.
Whether you’re dealing with malware infections, unauthorized access, or suspicious redirects, these proven strategies will help you regain control and protect your WordPress security investment for the future.
Table of Contents
- Signs Your WordPress Site Has Been Compromised
- Immediate Response: Securing Your Hacked WordPress Site
- Complete Malware Removal and Site Cleanup Process
- Restoring Functionality After WordPress Security Breach
- Essential WordPress Security Hardening Measures
Signs Your WordPress Site Has Been Compromised
Recognizing a WordPress hack early can save you hours of cleanup work and prevent further damage to your online reputation. Here are the most common warning signs that indicate your wordpress site has been hacked.
1. Can’t Access Your WordPress Dashboard
The most obvious red flag is being locked out of your own website. If your usual login credentials suddenly stop working, or you’re redirected to a different page when trying to access /wp-admin/, there’s a good chance someone changed your password or created backdoors in your system.
Sometimes you’ll see a completely different login screen, or your browser might display certificate warnings when accessing the admin area. Don’t ignore these signs – they often indicate that hackers have modified core WordPress files or installed malicious scripts.
2. Unexpected Website Redirects
Malicious redirects are a hacker’s favorite monetization method. Your visitors might click on your homepage but end up on pharmaceutical sites, adult content, or fake antivirus warnings. These redirects often happen randomly, making them harder to detect during your own browsing sessions.
Check your site from different devices and locations. Sometimes, redirects only trigger for specific geographic regions or user agents.
Google Safe Browsing warnings in search results are another clear indicator that your site is redirecting visitors to harmful content.
3. Google Blacklist Warnings and Search Issues
Google actively monitors websites for malware and suspicious activity. If your site gets flagged, you’ll see warnings like “This site may be hacked” or “Suspected malware site” in search results. These warnings can devastate your organic traffic overnight.

Your Google Search Console account will show security issues notifications if Google detects problems. Browser warnings from Chrome, Firefox, or Safari also indicate that security databases have flagged your domain.

Don’t wait to investigate these warnings – they significantly impact user trust and search rankings.
4. Suspicious User Accounts and Admin Access
Check your WordPress Users section regularly for accounts you didn’t create. Hackers often establish backdoor access by creating admin-level user accounts with innocent-looking usernames like “admin2” or “support.”

Look for users with suspicious email addresses, especially those using temporary email services or domains that don’t match your business. If you find unauthorized accounts, document their details before deleting them – this information helps identify how the breach occurred.
5. Unexplained Content Changes and Spam Links
Hackers frequently inject spam content to boost their own SEO rankings. You might discover new pages filled with pharmaceutical ads, gambling links, or adult content. Sometimes they hide these pages from your main navigation but leave them accessible to search engines.
Check your recent posts and pages for unusual edits. Look for hidden text, strange anchor text links, or content that doesn’t match your writing style. Hackers also modify existing content by adding invisible spam links using CSS techniques or white text on white backgrounds.
6. Performance Issues and Traffic Drops
A hacked wordpress website often experiences sudden performance problems. Your site might load slowly, display database connection errors, or crash frequently. These issues arise from two main causes: malicious scripts consuming server resources or hackers using your site to send spam emails.
Monitor your Google Analytics for unusual traffic patterns. Sudden drops in organic traffic might indicate that Google has penalized your site. Conversely, traffic spikes from unexpected countries could mean your site is being used for malicious redirects or botnet activities.
Pro Tip: Set up Google Search Console email alerts to get immediate notifications about security issues. This early warning system enables you to respond to hacks within hours, rather than weeks.
Immediate Response: Securing Your Hacked WordPress Site
Once you’ve confirmed that your WordPress-hacked site needs immediate attention, follow these critical first steps to prevent further damage and protect your visitors.
1. Enable Maintenance Mode Immediately
Before attempting any cleanup, put your site in maintenance mode to protect visitors from malware and prevent hackers from causing additional damage. Use a maintenance mode plugin like “Maintenance” or add a simple maintenance message to your theme.

If you can’t access your WordPress dashboard, create a basic HTML file named maintenance.html and upload it via SFTP. Then use your hosting control panel to redirect all traffic to this temporary page. This step is crucial – it prevents visitors from encountering malware while you work on the cleanup process.
Don’t skip this step even if the hack seems minor. Active malware can infect visitor devices, damage your reputation, and trigger additional security warnings from browsers and search engines.
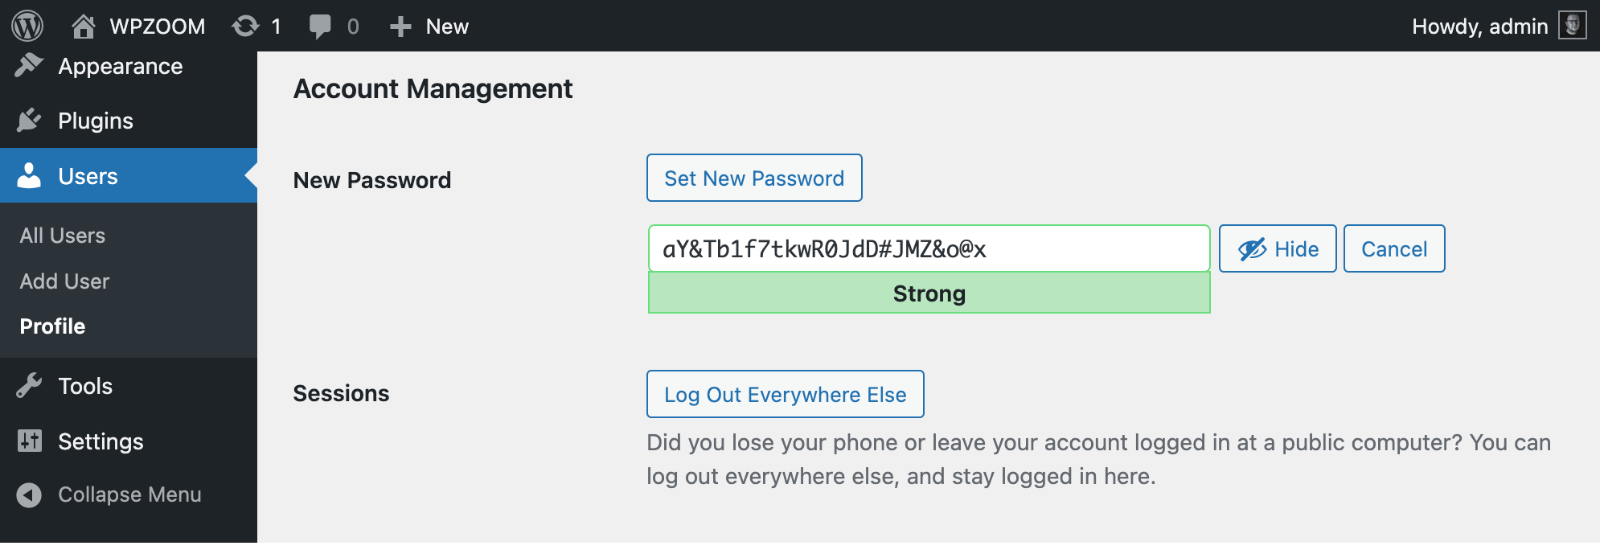
2. Reset All Account Passwords
Change every password associated with your website infrastructure immediately. Begin by securing your WordPress admin accounts, followed by hosting control panels, FTP accounts, and database access credentials.
Use strong, unique passwords for each account. Password managers like Bitwarden make this process easier by generating and storing complex passwords automatically. Don’t reuse passwords across different services – if hackers compromise one account, they’ll try the same credentials elsewhere.
Include email accounts in your password reset process. Many hacks begin with compromised email accounts that give attackers access to password reset links for other services.
3. Contact Your Hosting Provider
Reach out to your hosting company’s support team immediately. They can provide server logs that show how the attack occurred, temporarily isolate your account to prevent spread to other sites, and sometimes help with automated malware removal.
Many hosting providers offer free malware scanning and removal services. Some companies include security monitoring in their managed WordPress hosting plans. Even shared hosting providers often have security teams that can assist with basic cleanup tasks.
Request the most recent server access logs and error logs. These files contain valuable information about suspicious file uploads, login attempts, and script executions that can help identify the attack vector.
4. Document the Hack Evidence
Before making any changes, document what you’re seeing. Take screenshots of error messages, suspicious files, and any unusual admin panel content. This evidence helps identify how the breach occurred and prevents similar attacks in the future.
Make note of when you first discovered the hack and any recent changes to your website. Did you install new plugins recently? Update themes? Change hosting providers? This timeline helps security experts understand the attack sequence.
Keep a list of affected pages, suspicious files, and any ransom messages or defacements. Some attacks are targeted and might contain clues about the attacker’s identity or methods.
5. Create a Pre-Cleanup Backup
Although it sounds counterintuitive, back up your hacked site before beginning cleanup. This backup serves as evidence and provides a restore point if your cleanup efforts accidentally break functionality.
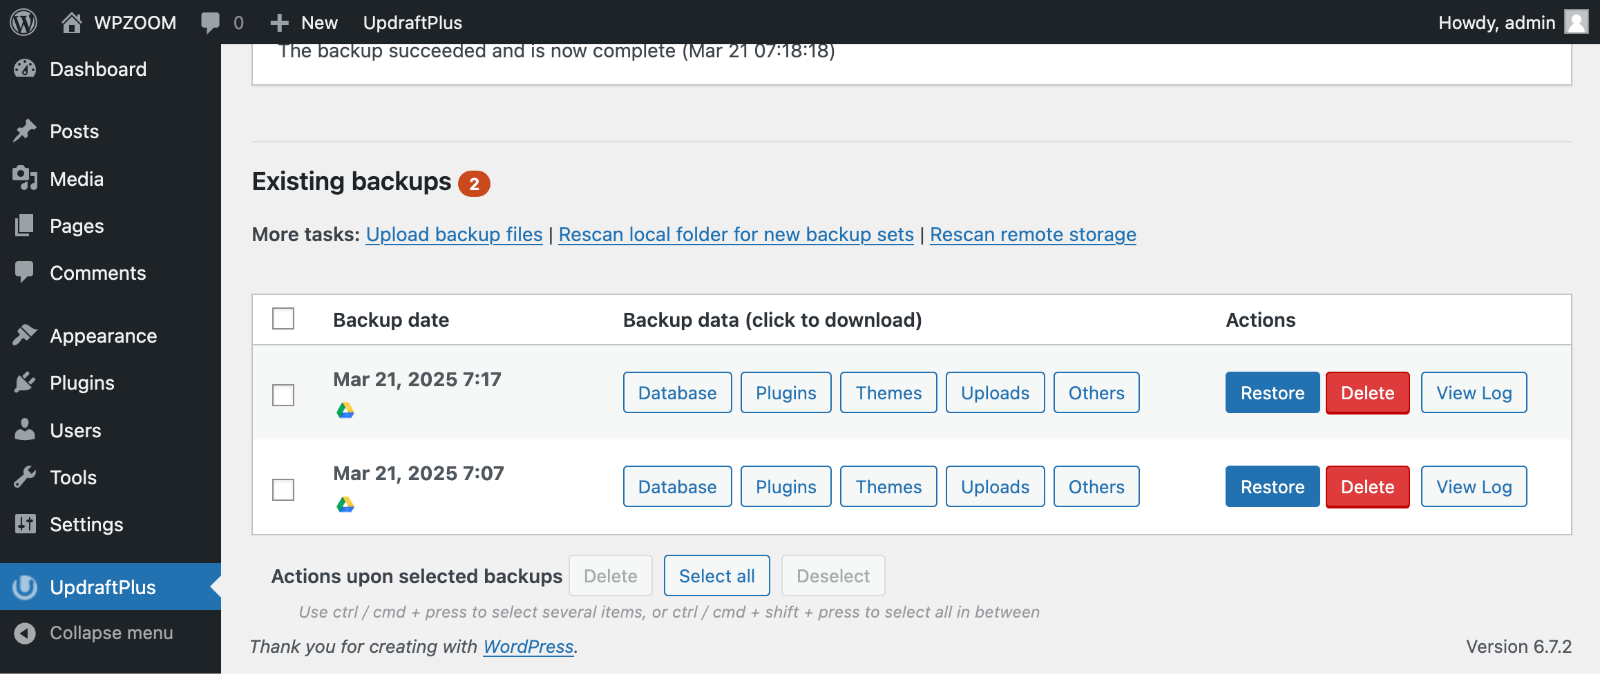
Store this backup separately from your regular backup system. Label it clearly as “infected backup” to prevent accidentally restoring malware later. Some security plugins can create safe backups that exclude malicious files while preserving your legitimate content.
If you don’t have recent clean backups, this infected backup might contain the only copy of recent legitimate content changes. You can extract clean content from it after professional malware removal.
Pro Tip: Set up a staging environment for cleanup work if possible. This allows you to test removal procedures without affecting your live site’s uptime or search engine rankings.
Upgrade Your Website with a Premium WordPress Theme
Find a theme that you love and get a 10% discount at checkout with the FLASH10 code
Choose your theme
Complete Malware Removal and Site Cleanup Process
Removing malware from a hacked wordpress website requires systematic scanning and cleanup of infected files, database entries, and configuration settings. Here’s how to thoroughly clean your compromised site.
1. Automated Security Scanning and Removal
Begin with comprehensive malware scanner plugins that can automatically identify and remove most malware. Sucuri Security, MalCare, and Wordfence offer powerful malware scanners that detect malicious code patterns, backdoors, and suspicious file modifications.
Install your chosen security plugin and run a full website scan. These tools compare your files against clean WordPress installations and flag anything that looks suspicious. They’ll identify infected core files, compromised themes, and malicious uploads in your wp-content directory.
Be patient during the initial scan – comprehensive malware detection can take 30-60 minutes, depending on your site size.
Review scan results carefully before approving automatic cleanup actions. Some plugins might flag legitimate customizations as suspicious, so verify that proposed changes won’t break your site functionality.
2. Manual File Inspection Through cPanel
Access your hosting control panel’s File Manager to examine suspicious files manually. Look for recently modified files in unexpected locations, especially PHP files in your uploads directory where they shouldn’t exist.
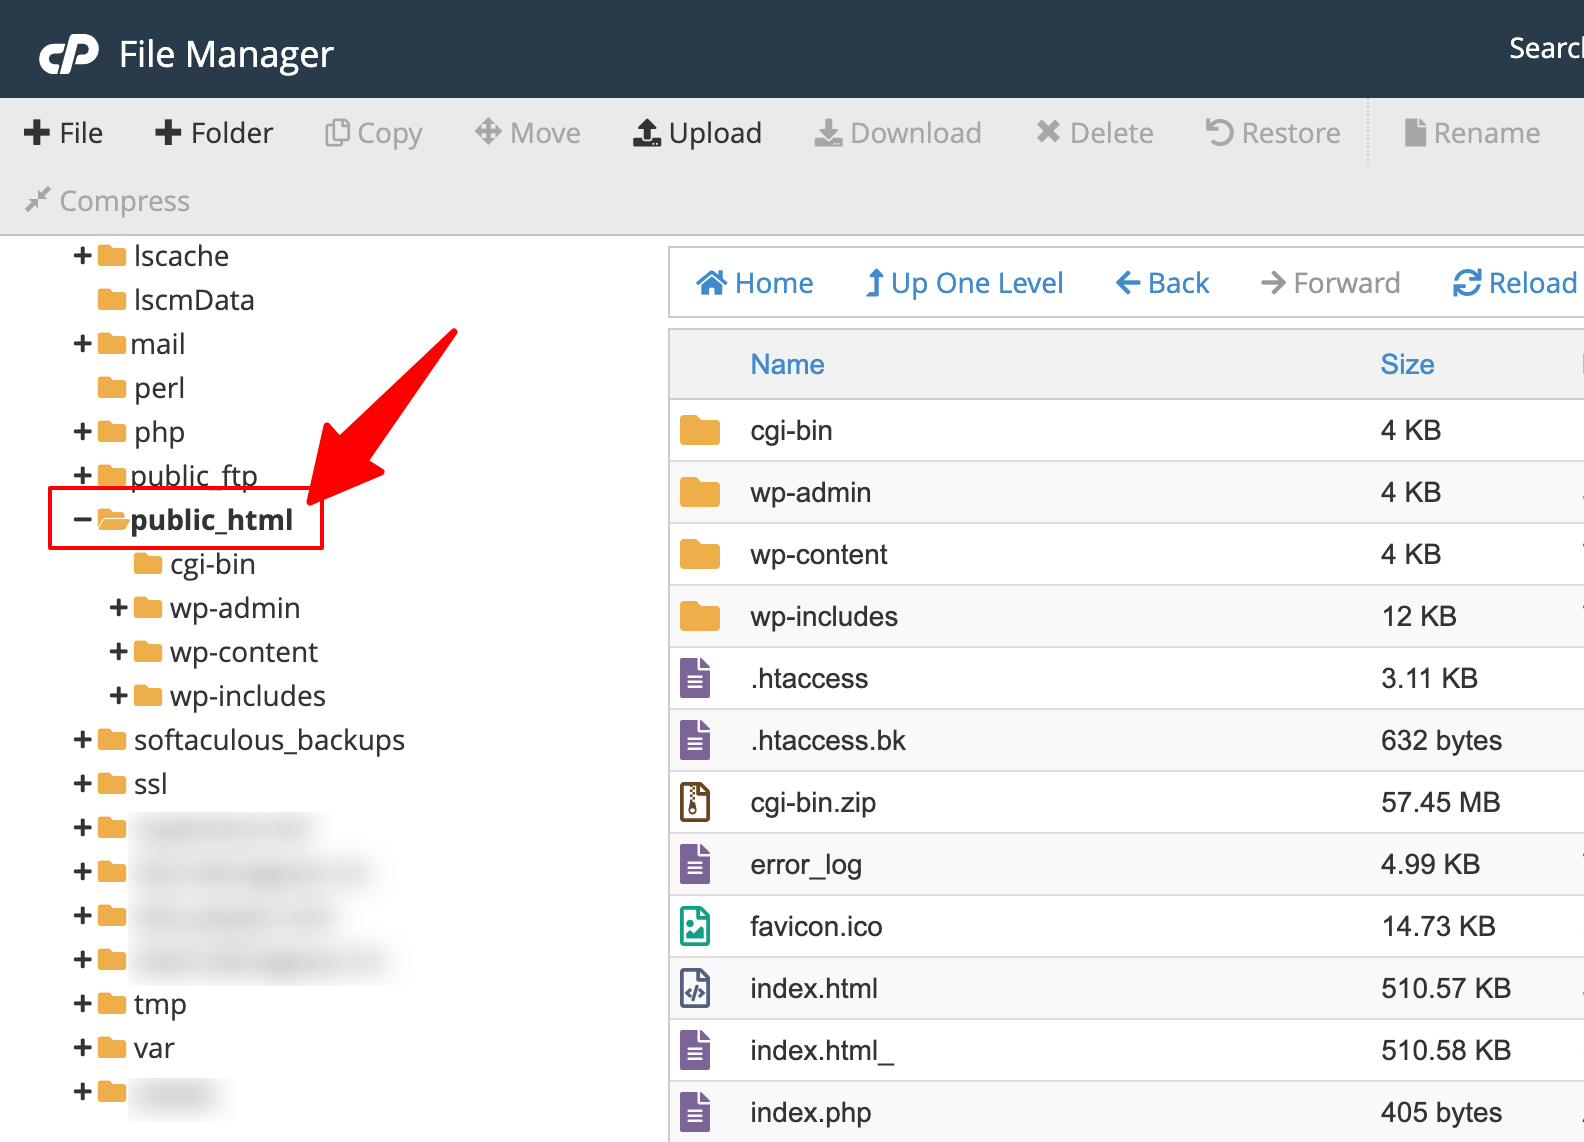
Check file timestamps to identify recently created or modified files that coincide with your hack discovery date. Hackers often upload backdoor scripts to random folder locations, sometimes with innocent-sounding names like “config.php” or “functions.php” in non-WordPress directories.
Examine your .htaccess file carefully. Hackers frequently modify this file to create malicious redirects or hide spam pages from website owners while showing them to search engines. Compare your .htaccess content with a clean WordPress installation to spot unauthorized additions.
3. Cleaning Infected Upload Directories
Your /wp-content/uploads/ folder is a common target for malicious file uploads. Scan this directory for PHP files, which should never exist in an uploads folder meant for images and media files.
Look for suspicious image files with unusual names or recent upload dates that don’t correspond to your content publishing schedule. Some malware disguises itself as images while containing executable PHP code.
Remove any executable files from upload directories and verify that file permissions are set correctly. Upload directories should use 755 permissions for folders and 644 for files. Never use 777 permissions, which give unrestricted access to potential attackers.
4. WordPress Core File Restoration
Download a fresh copy of your WordPress version from WordPress.org and compare core files with your installation. Replace any modified core files with clean versions to eliminate malware hiding in essential WordPress functionality.
Avoid deleting and reinstalling your entire WordPress installation, as this approach can break customizations and plugin configurations. Instead, selectively replace compromised core files while preserving your wp-content directory and wp-config.php settings.
Pay special attention to the wp-includes and wp-admin directories, where hackers often hide backdoor scripts. These directories should only contain official WordPress files, so any additions are likely malicious.
5. Database Cleanup Using phpMyAdmin
Access your WordPress database through phpMyAdmin in your hosting control panel. Look for suspicious entries in your posts, options, and users tables where hackers commonly hide malicious content.
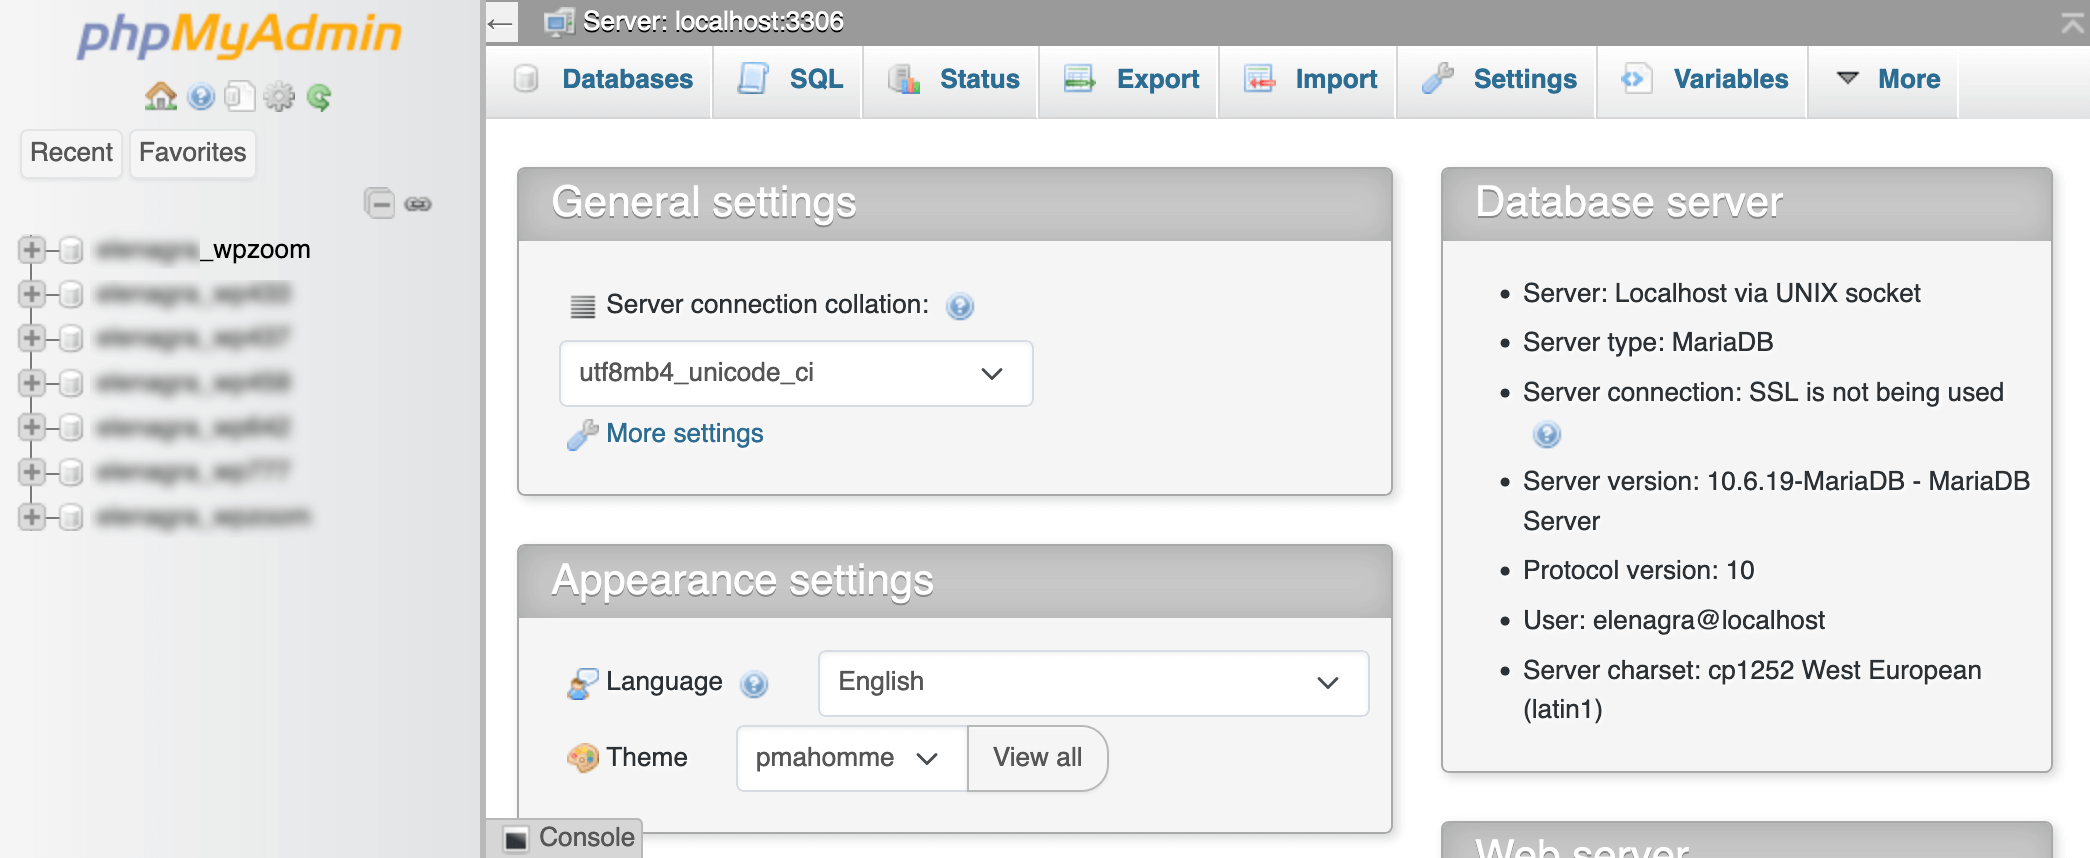
Check the wp_posts table for spam content, hidden pages, and posts with suspicious titles or content. Search for common spam keywords and remove posts you didn’t create. Be careful not to delete legitimate content during this process.
Examine the wp_options table for unfamiliar settings, especially those related to themes, active plugins, or admin settings. Hackers sometimes add malicious configuration options that execute scripts or modify site behavior.
Review user accounts in the wp_users table and remove any admin-level accounts you didn’t create. Change the passwords for all remaining user accounts and verify that user roles match your intended access levels.
6. File Permission Configuration
Set proper file permissions throughout your WordPress installation to prevent future unauthorized modifications. WordPress files should use 644 permissions, while directories need 755 permissions for proper security.

Your wp-config.php file requires 600 permissions since it contains sensitive database credentials. The .htaccess file should use 644 permissions to allow legitimate modifications while preventing unauthorized changes.
Avoid 777 permissions entirely – they grant unrestricted read, write, and execute access to all users, creating significant security vulnerabilities. Some hosting providers automatically reset dangerous permissions, but verify these settings manually after cleanup.
Pro Tip: Use SFTP or SSH access instead of FTP when possible. These secure protocols encrypt your file transfers, preventing hackers from intercepting your credentials during cleanup activities.
Restoring Functionality After WordPress Security Breach
After removing malware from your hacked wordpress site, you need to systematically restore functionality and verify that all systems work properly.
1. Clean WordPress Core Installation
Replace your WordPress core files with a fresh download from WordPress.org to ensure complete removal of any remaining malware. Keep your existing wp-config.php file and wp-content directory, but replace everything else with clean versions.
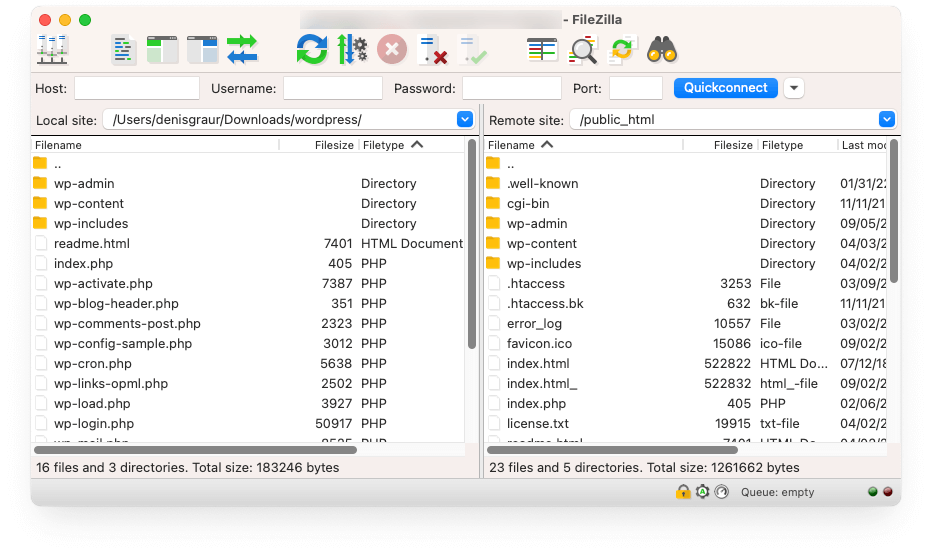
This process updates your WordPress installation to the latest security version while preserving your content, themes, and plugins. Upload the new WordPress files via SFTP, overwriting existing core files but leaving your customizations intact.
Test your site’s basic functionality after core file replacement. Check that you can access the admin dashboard, view posts and pages, and navigate your site normally. If something breaks, investigate which customizations might have depended on modified core files.
2. Plugin and Theme Updates
Update all installed plugins and themes to their latest versions immediately. Outdated plugins are common entry points for attacks, and newer versions often include security patches that prevent reinfection.
Remove any plugins or themes you’re not actively using. Inactive code still creates security vulnerabilities if it contains exploitable weaknesses. Every additional plugin increases your site’s attack surface, so maintain only essential functionality.
Check plugin ratings and update frequency before reinstalling them. Avoid plugins that haven’t been updated in over a year or have poor security reputations. Look for alternatives from reputable developers with regular update schedules.
3. Access Level Verification
Review all user accounts and their permission levels carefully. Remove any accounts you don’t recognize and ensure that the remaining users have appropriate access for their roles.
Test login functionality for all legitimate user accounts. Verify that contributors can’t access admin features and that subscriber accounts have appropriately limited permissions. Sometimes, hacks modify user capabilities, granting excessive access to compromised accounts.
4. Search Engine Resubmission
Submit a clean sitemap to Google Search Console to help search engines discover that your site is now safe. This process accelerates the removal of security warnings from search results, helping to restore your organic traffic.

Request a security review through Google Search Console if your site was blacklisted. Google will re-scan your site and remove security warnings once it confirms the malware removal was successful.
Monitor your search engine rankings and traffic patterns for several weeks after the cleanup. It can take time for search engines to trust your site again and restore previous ranking positions.
5. Functionality Testing Checklist
Test all critical site features systematically. Check contact forms, e-commerce functionality, user registration, and any custom features specific to your site. Malware removal sometimes affects legitimate scripts that share similar patterns with malicious code.
Verify that SSL certificates work properly and that secure connections display correctly in browsers. Some attacks modify SSL configurations or install rogue certificates that need replacement during cleanup.
Test your site’s loading speed and performance. Remove any lingering malicious scripts that might slow down page loading or consume excessive server resources.
Essential WordPress Security Hardening Measures
Preventing future WordPress security breaches requires implementing multiple layers of protection and maintaining ongoing security vigilance.
1. Comprehensive Security Plugin Installation
Install a robust security plugin that provides real-time monitoring, malware scanning, and brute force protection. Wordfence, All-In-One Security (AIOS), and Jetpack Protect offer comprehensive security suites that monitor your site 24/7 for suspicious activity.
Configure your security plugin to send immediate email alerts for login attempts, file changes, and potential security threats. Early detection allows you to respond to attacks before they cause significant damage.
Enable automatic malware scanning and set up scheduled security audits. Weekly scans help identify new threats quickly, while daily monitoring protects against rapidly spreading malware campaigns.
2. Two-Factor Authentication Implementation
Enable 2FA for all administrator accounts immediately. This security measure prevents unauthorized access even if hackers obtain your login credentials through data breaches or phishing attacks.
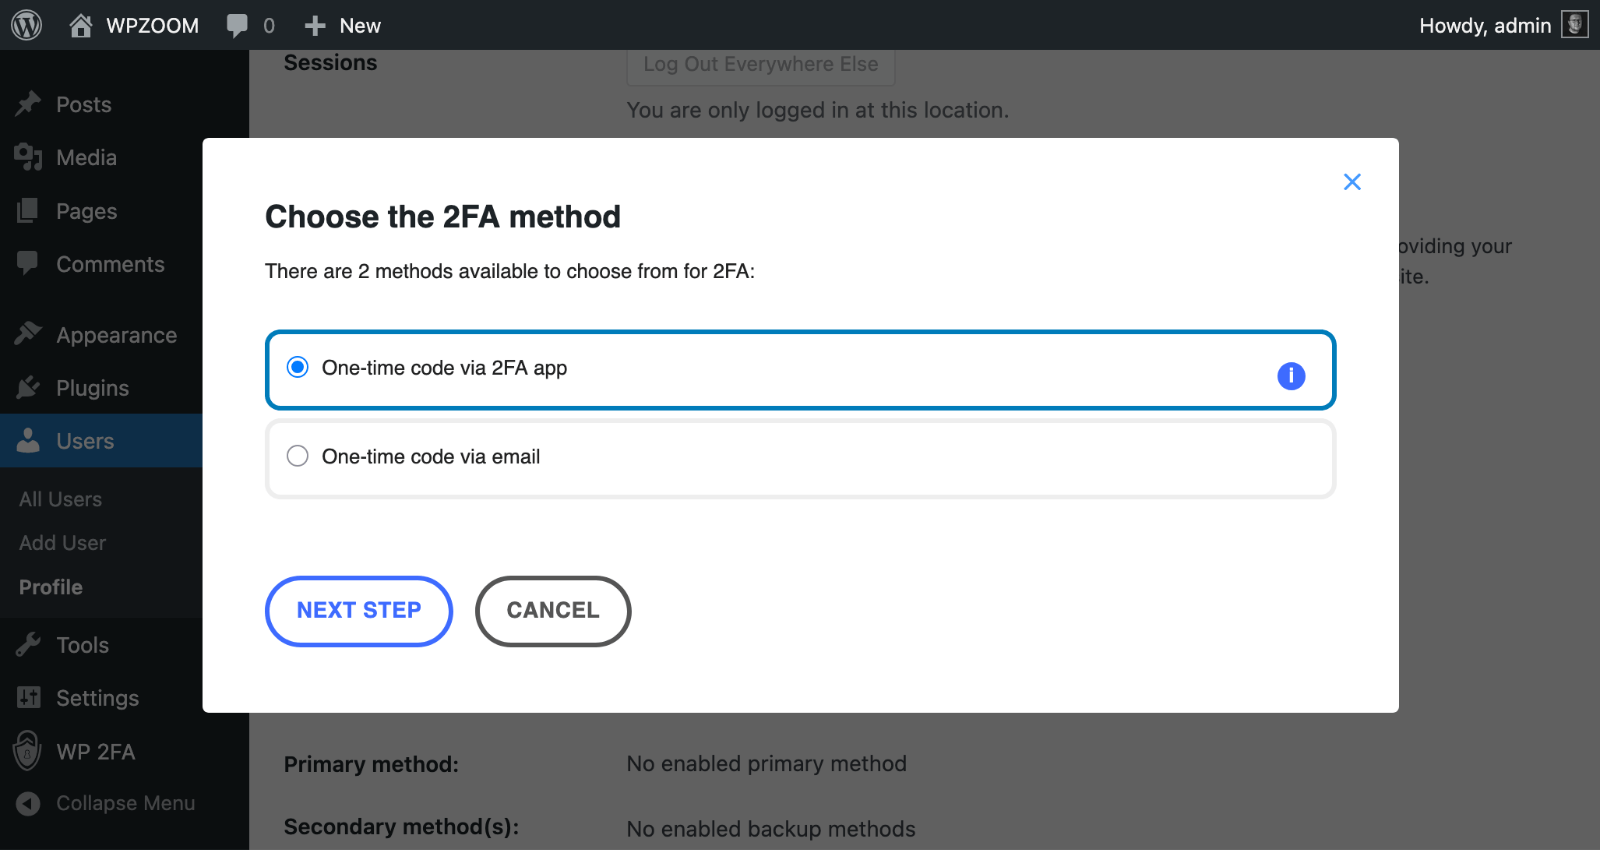
Choose authentication apps like Google Authenticator or Authy rather than SMS-based 2FA, which can be compromised through SIM swapping attacks. Some security plugins include built-in 2FA functionality that integrates seamlessly with WordPress.
Require 2FA for all user roles that can publish content or modify site settings. This includes editors, authors, and any custom roles with elevated permissions beyond basic subscriber access.
3. Automated Backup Systems
Set up automated backups that store copies of your site off-site, away from your main hosting server. Services like BlogVault create daily backups and store them on a separate infrastructure that hackers can’t access.
Test your backup restoration process regularly to ensure backups work when needed. Many site owners discover their backups are corrupted or incomplete only after experiencing a security breach.
Maintain multiple backup versions spanning several weeks. This approach allows you to restore from a point before malware infection began, even if the initial compromise went undetected for some time.
4. SSL Certificate and Secure Hosting
Implement SSL certificates across your entire site, not just login and checkout pages. Modern browsers flag non-SSL sites as “not secure,” and search engines favor HTTPS sites in rankings.

Configure your hosting environment to use secure protocols like SFTP instead of plain FTP. Secure file transfer protocols encrypt your credentials and prevent interception during routine maintenance tasks.
Review your hosting provider’s security features and consider upgrading to managed WordPress hosting if you’re currently using shared hosting.
Managed hosts typically include automatic security updates, malware scanning, and expert support for security incidents. They often block malicious traffic at the server level before it reaches your WordPress installation. They maintain updated PHP versions, secure server configurations, and regular security patches that shared hosts might delay or skip entirely.
5. Brute Force Attack Protection
Configure login attempt limits to block IP addresses that try multiple failed logins. Most security plugins include this feature and can automatically ban suspicious IP addresses for specified time periods.
Change your WordPress login URL from the default /wp-admin/ to a unique URL. This simple change prevents automated attack scripts from finding your login page, significantly reducing the volume of brute force attempts.
Implement CAPTCHA protection for login forms to prevent automated login attempts. This measure stops bot attacks while allowing legitimate users to access their accounts normally.
6. Regular Security Audits
Schedule monthly security audits to review user accounts, installed plugins, and file integrity. Regular maintenance helps identify security issues before they become serious problems.
Monitor your site’s activity logs for suspicious patterns, such as unusual login times, unexpected file uploads, or configuration changes you didn’t make. Many hosting providers offer log analysis tools through their control panels.
Keep detailed records of security measures, updates, and any incidents. This documentation helps identify attack patterns and improve your response procedures for future security events.
Pro Tip: Implement a credential rotation schedule that changes all passwords every 90 days. Use a password manager to generate and store unique passwords for each service, making this process manageable and secure.
7. Content Delivery Network Security
Cloudflare offers free and paid CDN services that include basic firewall protection and DDoS mitigation. Their Web Application Firewall (WAF) blocks common attack patterns before they reach your WordPress site.
CDN protection reduces server load and provides geographic redundancy that maintains site availability during attacks. Many CDNs offer SSL certificates and security monitoring as part of their service packages.
Protect Your WordPress Investment with WPZOOM
Protect your WordPress investment with professionally designed, security-optimized themes from WPZOOM. Our premium themes feature clean code, regular security updates, and built-in performance optimization to reduce hacking vulnerabilities.
Choose from our extensive collection of responsive, SEO-friendly designs that prioritize both aesthetics and security. Start building a more secure WordPress site today with WPZOOM’s trusted theme solutions.