FLASH SALE Get 20% OFF everything using the coupon code: FLASH20 View Pricing Plans →
Unlike Inspiro Premium, Inspiro Lite doesn’t include a built-in portfolio section. Instead, you can create a professional-looking portfolio using the free WPZOOM Portfolio plugin. This plugin allows you to add portfolio items, create layouts, and display them anywhere on your website.
1. Install and activate the WPZOOM Portfolio plugin.

2. In your Dashboard, go to Portfolio → Add New or Portfolio → Portfolio Items → Add New.
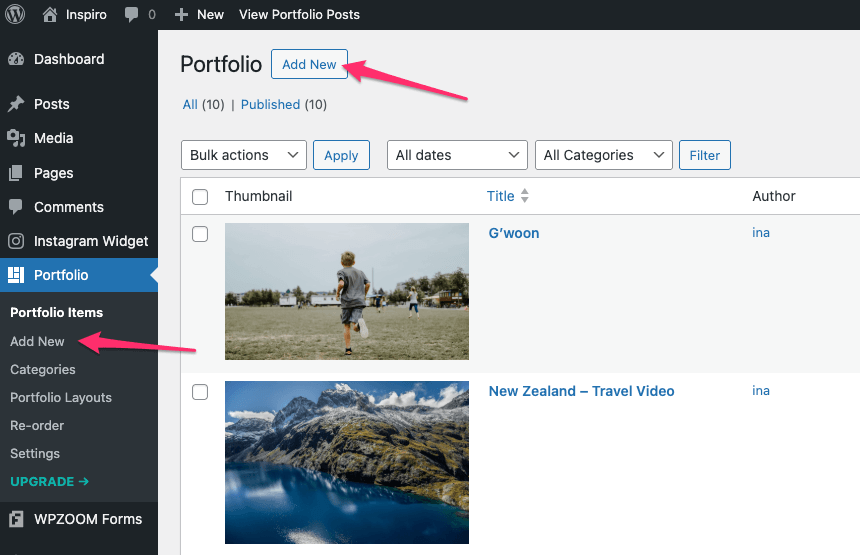
3. Add a title, portfolio content, and assign a featured image.
4. Optionally, assign the item to a category.

5. Click Publish.
Repeat these steps to add as many portfolio items as needed. These items will later populate your portfolio section.
1. Go to Portfolio → Portfolio Layouts and click Add New Portfolio Layout.

A predefined portfolio layout will open in the editor, displaying your existing portfolio items. The settings of the predefined portfolio layout can be changed in Portfolio → Settings → Taxonomy.

2. Add a title for the layout.
3. Click on the Portfolio block in the editor to adjust settings in the right sidebar:
You can also set the width and alignment of the portfolio section in the block toolbar.

Note: The block also supports blog posts, so you can use it to create a post index or, for example, a travel destinations grid.
The Styles panel in the block editor allows you to customize the appearance of your portfolio layout.

Available style settings include:
Make adjustments as needed and click Publish or Save to apply changes.
You can display your portfolio section in two ways:
1. Copy the shortcode from the Shortcode panel in your Portfolio Layout, or from the Portfolio → Portfolio Layouts list.

2. Open any page or post and add a Shortcode block.

3. Paste the shortcode and click Publish.
Any changes you make to the layout in Portfolio → Portfolio Layouts will automatically update wherever the shortcode is used.
The plugin provides two blocks:
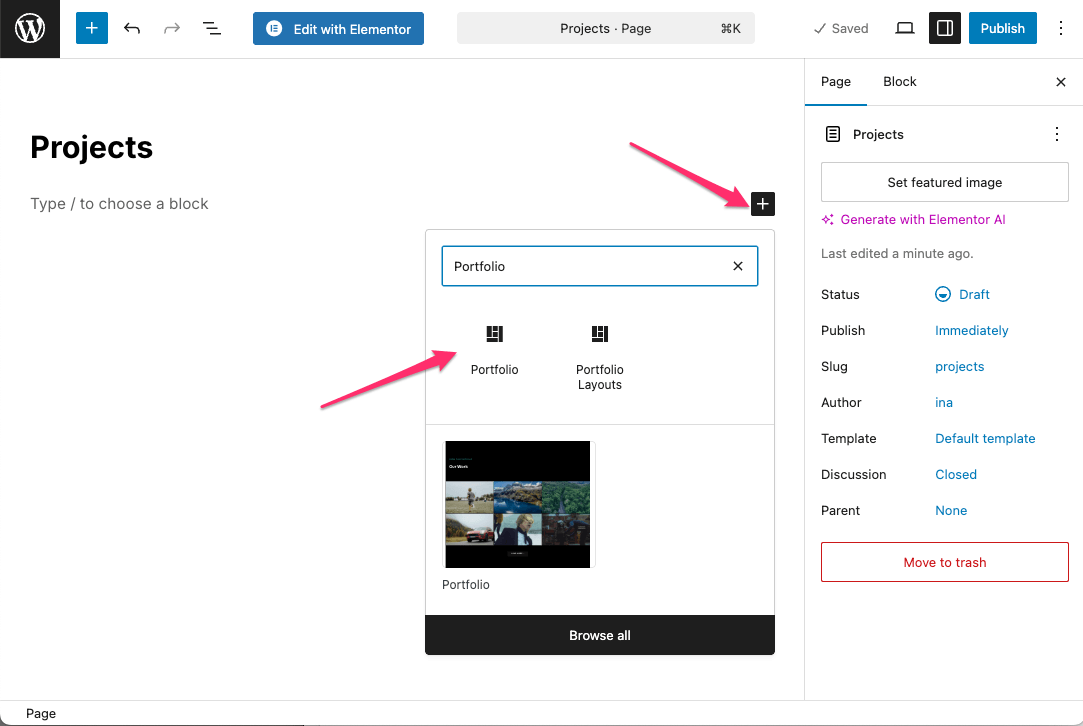
In Elementor, you can insert the portfolio section using a shortcode:
1. Create or edit a page with Elementor.
2. Add a new Section and insert a Shortcode or Text widget.

3. Paste the shortcode of your Portfolio Layout.

4. Update the page by clicking Publish.
Note: Portfolio layouts cannot be customized in Elementor. To make changes, edit the layout in Portfolio → Portfolio Layouts.
By default, portfolio items are ordered by publication date. To reorder them:
1. Go to Portfolio → Re-order.
2. Drag and drop items using the handle (three-line icon) to set the desired order.
3. Click Save Order.

To reset to the default order, click Reset Order.